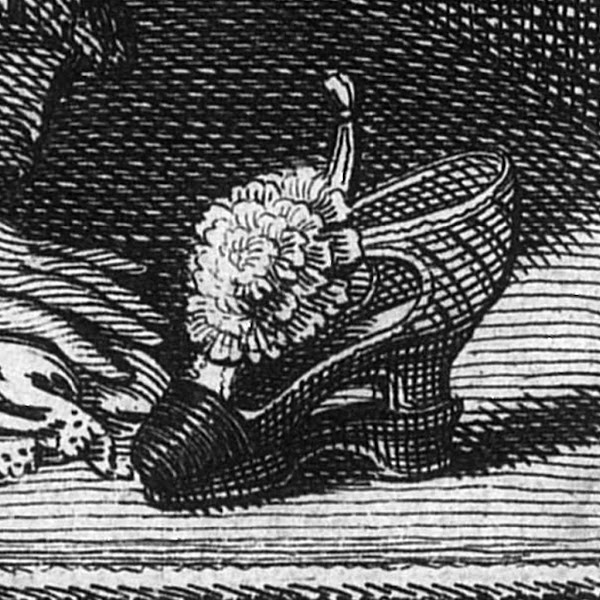
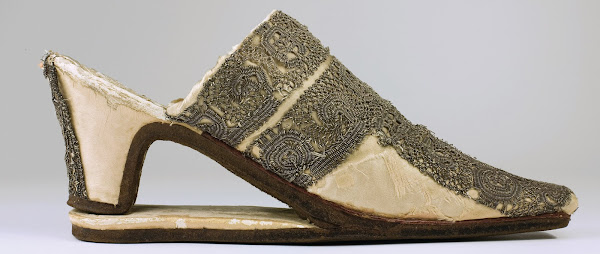
Slap sole shoes were developed in the early 1600’s as a means to protect the shoe from sinking into the ground. It featured a 2-part system where a shoe was slipped inside a flat sole mule (backless shoe). By the mid-17th century these two components had become integral and primarily a dress staple for the fashionable woman.
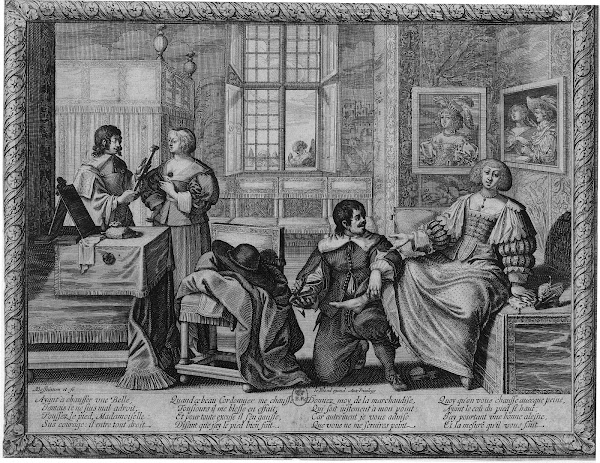
The Shoemaker, plate 4 from The Trades, Abraham Bosse, France 1632 – 35, collection of the Bata Shoe Museum
The challenges faced in the conservation of shoes stem from: 1) the diminutive size, which makes damaged areas difficult to access, and 2) the structure, which is composed of different materials in multiple layers stitched together, making their separation impossible. In this instance the object is small and the component materials are fragile. These elements need to be treated as a whole but must be considered independently of each other.
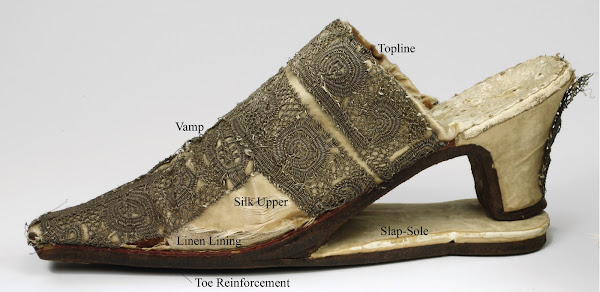
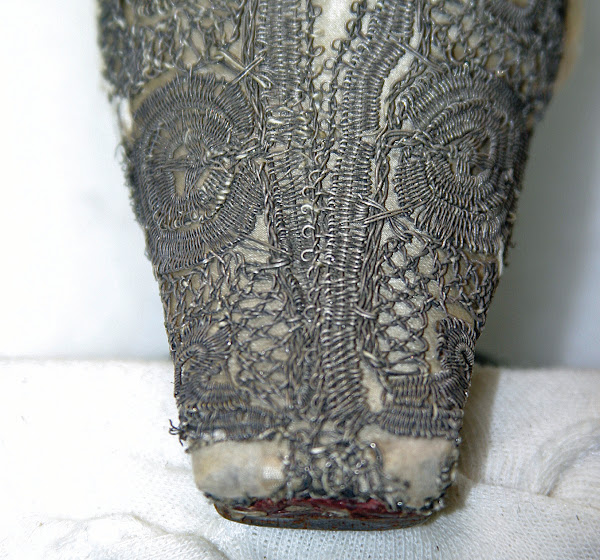
The upper/vamp (figure #1) is the most complicated part of a shoe to treat since access to the various layers can only be obtained by working through holes in the different materials. When a shoe is constructed, the components are worked around a wooden form, referred to as lasting, from the inner most layer to the outer decorative embellishments.
In this instance the vamp (figure #2) is composed of 5 integral layers, working from the inside-out: a lining made of vegetable tanned calf skin, followed by an inner lining of linen (this protects the back of the silk from abrasion with the flesh side of the calf skin), then a partial layer of thin calf skin as a toe reinforcement which is glued in place, and finally the outer layer, the silk satin upper (which was originally pink to which the silver braid was sewn before lasting.
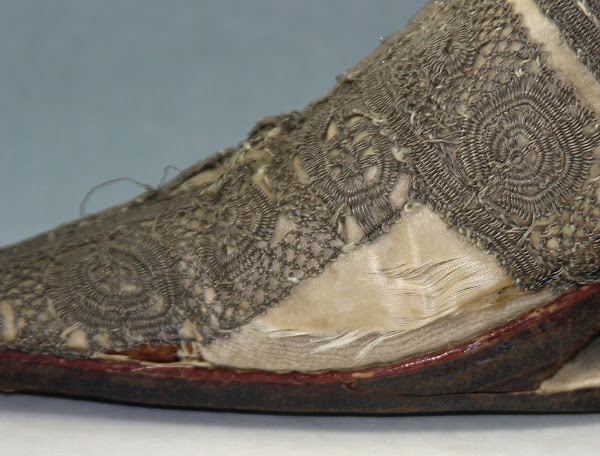
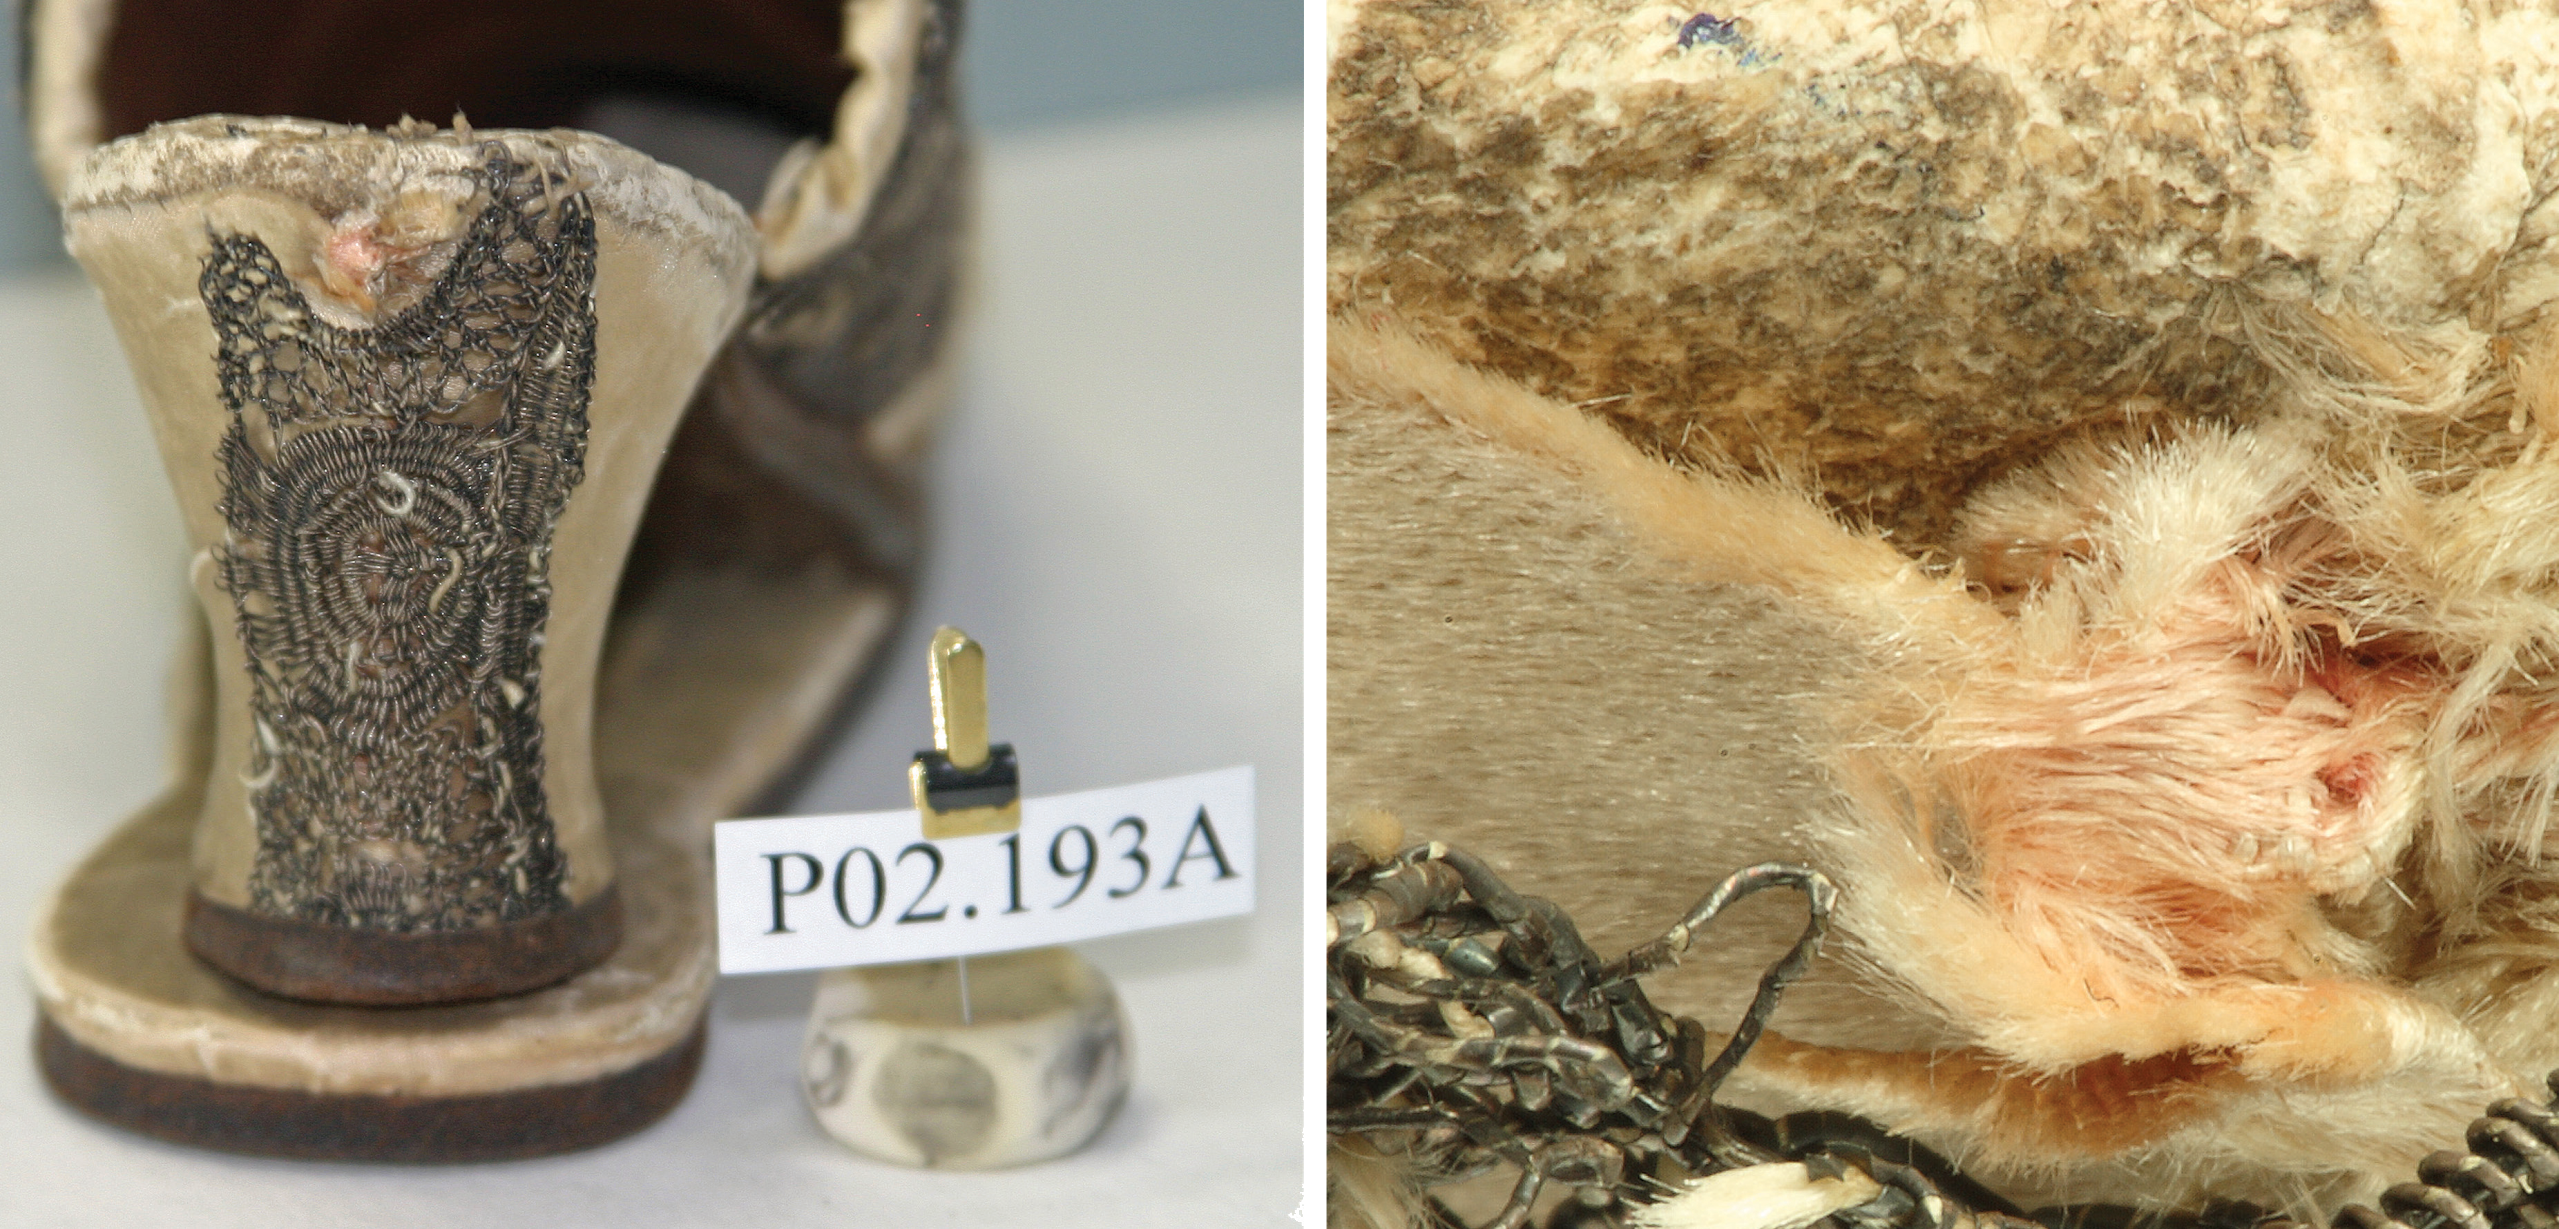
The satin was quite fragile and had suffered serious losses on both sides of the vamp plus minor fabric losses along the topline. This is very typical as these are high stress areas when the shoe is in movement. At some point in the past, an attempt had been made to secure the edges of the fraying silk with heavy linen thread. This caused even more damage as the thread acted like a knife breaking off tiny islands of the desiccated silk.
The metallic thread was made by wrapping a silver filament around a silk core which was then tatted to form lace. There were minor losses of silver accompanied by the usual tarnishing. Some of the metallic threads had unraveled around the corners of the toe and the back of the heel. This type of damage is very typical on shoes from the 17th and 18th centuries.
A variety of conservation adhesives, historically used at the BSM, were reviewed as possible options. The fragility of the extant silk prevented the use of stitches to secure the entire infill, a covering of fine silk net would require too much manipulation of the shoe, one adhesive would saturate the significantly degraded fabric and another commonly used adhesive did not have enough tack for this desiccated silk. Lascaux™ film, was the selected adhesive.
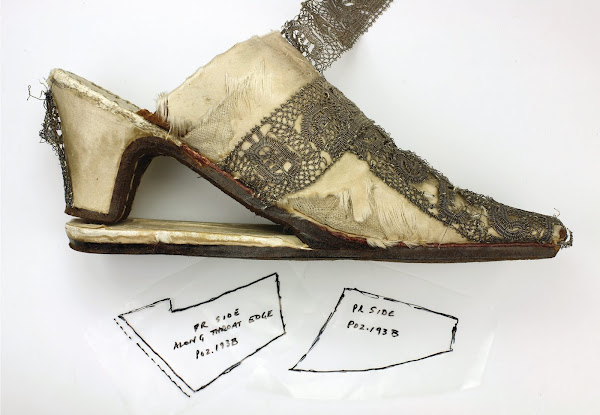
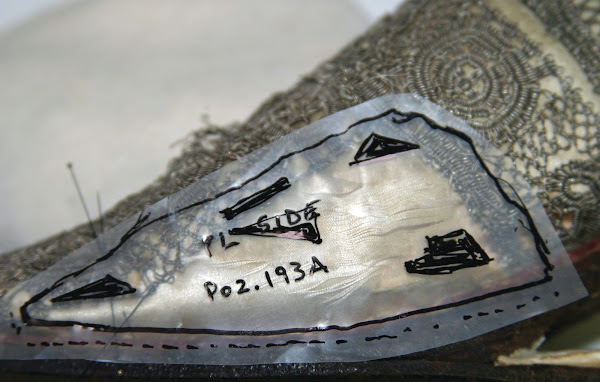
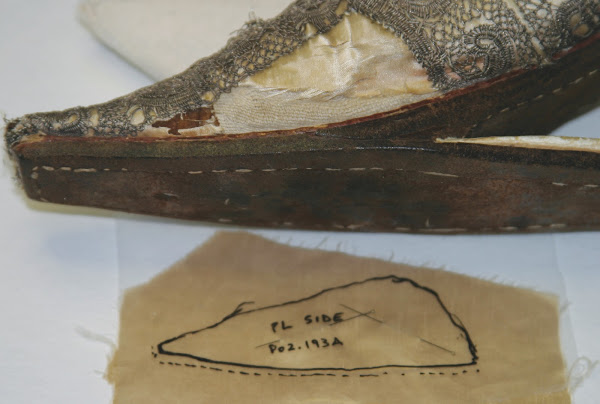
Templates of the textile losses (figure #3) were created by using polyethylene (PE) sheeting cut into squares larger than the area in need of an infill. The plastic sheet was placed over the loss and held securely with rare earth magnets (REM) to prevent it from shifting while the pattern was being traced. A thin tipped permanent marker was used to trace an outline slightly larger than the actual area of missing silk. The artefact number and location of the fill were written on the pattern once it was removed from the shoe (figure #4).
A silk satin of similar weight was selected for the fill. It was dyed in a hot bath of steeped Earl Grey tea for 30 seconds. Tea, used in the past for dying small batches of natural fibre textiles and lace, provides a pinky-yellow faded-antique colour to the bright white silk. Strands of hair silk, held together in a bundle with several loops of hair, were dyed to match in the same manner.
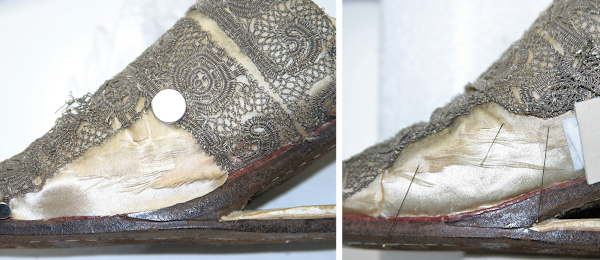
The first step was to align the fibres of the satin upper and remove the creases. The template of an individual section acted as a pattern to cut layers that were used throughout the process. A piece of mat board was inserted inside the shoe. The outside layers in order of placement were: Gortex, moistened acid free blotting paper, PE sheeting and a second piece of mat board. The mat board was molded by hand to conform to the specific shape of the vamp to which it was applied. REM held all the elements in place (figure #5a & #5b).
After about 15 minutes the humidity ‘sandwich’ was removed and a fine hair brush was used to orient the fibres. These steps were repeated until the damaged satin was properly aligned. The dampened blotting paper was removed and a dry piece inserted in its place. The magnets were reset and the reshaped satin was allowed to dry in place.
Next, the dyed fabric for each area of loss was cut to size using the templates (figure #6). Tiny strips of the adhesive film were cut to fit the perimeter of the extant satin. The infill was inserted between the upper and linen substrate and held in place with REM (figure #7a & #7b). Then the adhesive was solvent vapour activated using the ‘sandwich’ system employed for humidification. Frayed fibres (not secured by the film) along the edge of the loss were couch stitched in place with the hair silk. Once the infill was in place, unraveled sections of metal braid ornamentation were stitched down with hair silk, resulting in a stabilized and more visually coherent object.
Loss of satin on both sides of the toe box were filled with toned Japanese paper glued to the calf skin beneath. There was not enough ‘play’ room between the upper and the leather toe reinforcement to insert new pieces of fabric.
The conservation of footwear, for the most part, presents a 3D object made of textile, leather or both. These materials are generally held together with adhesives, stitching and/or wooden pegs. Generally, treatments tend to repeat themselves, but the size of the object can vary greatly. It can be a Chinese bound foot shoe 10cm in length or a Hausa horse riding boot that extends up over the thigh to attach to a garter at the waist. The challenge is navigating the physical structure and utilizing the damaged areas as a method for accessing the harder to reach design elements.


